UNIVERSAL TESTING PLATFORM
(UNITEST)
THE MOST ADVANCED and VERSATILE IN-SITU TEST PLATFORM
IN-SITU Tribology aND IMAGING
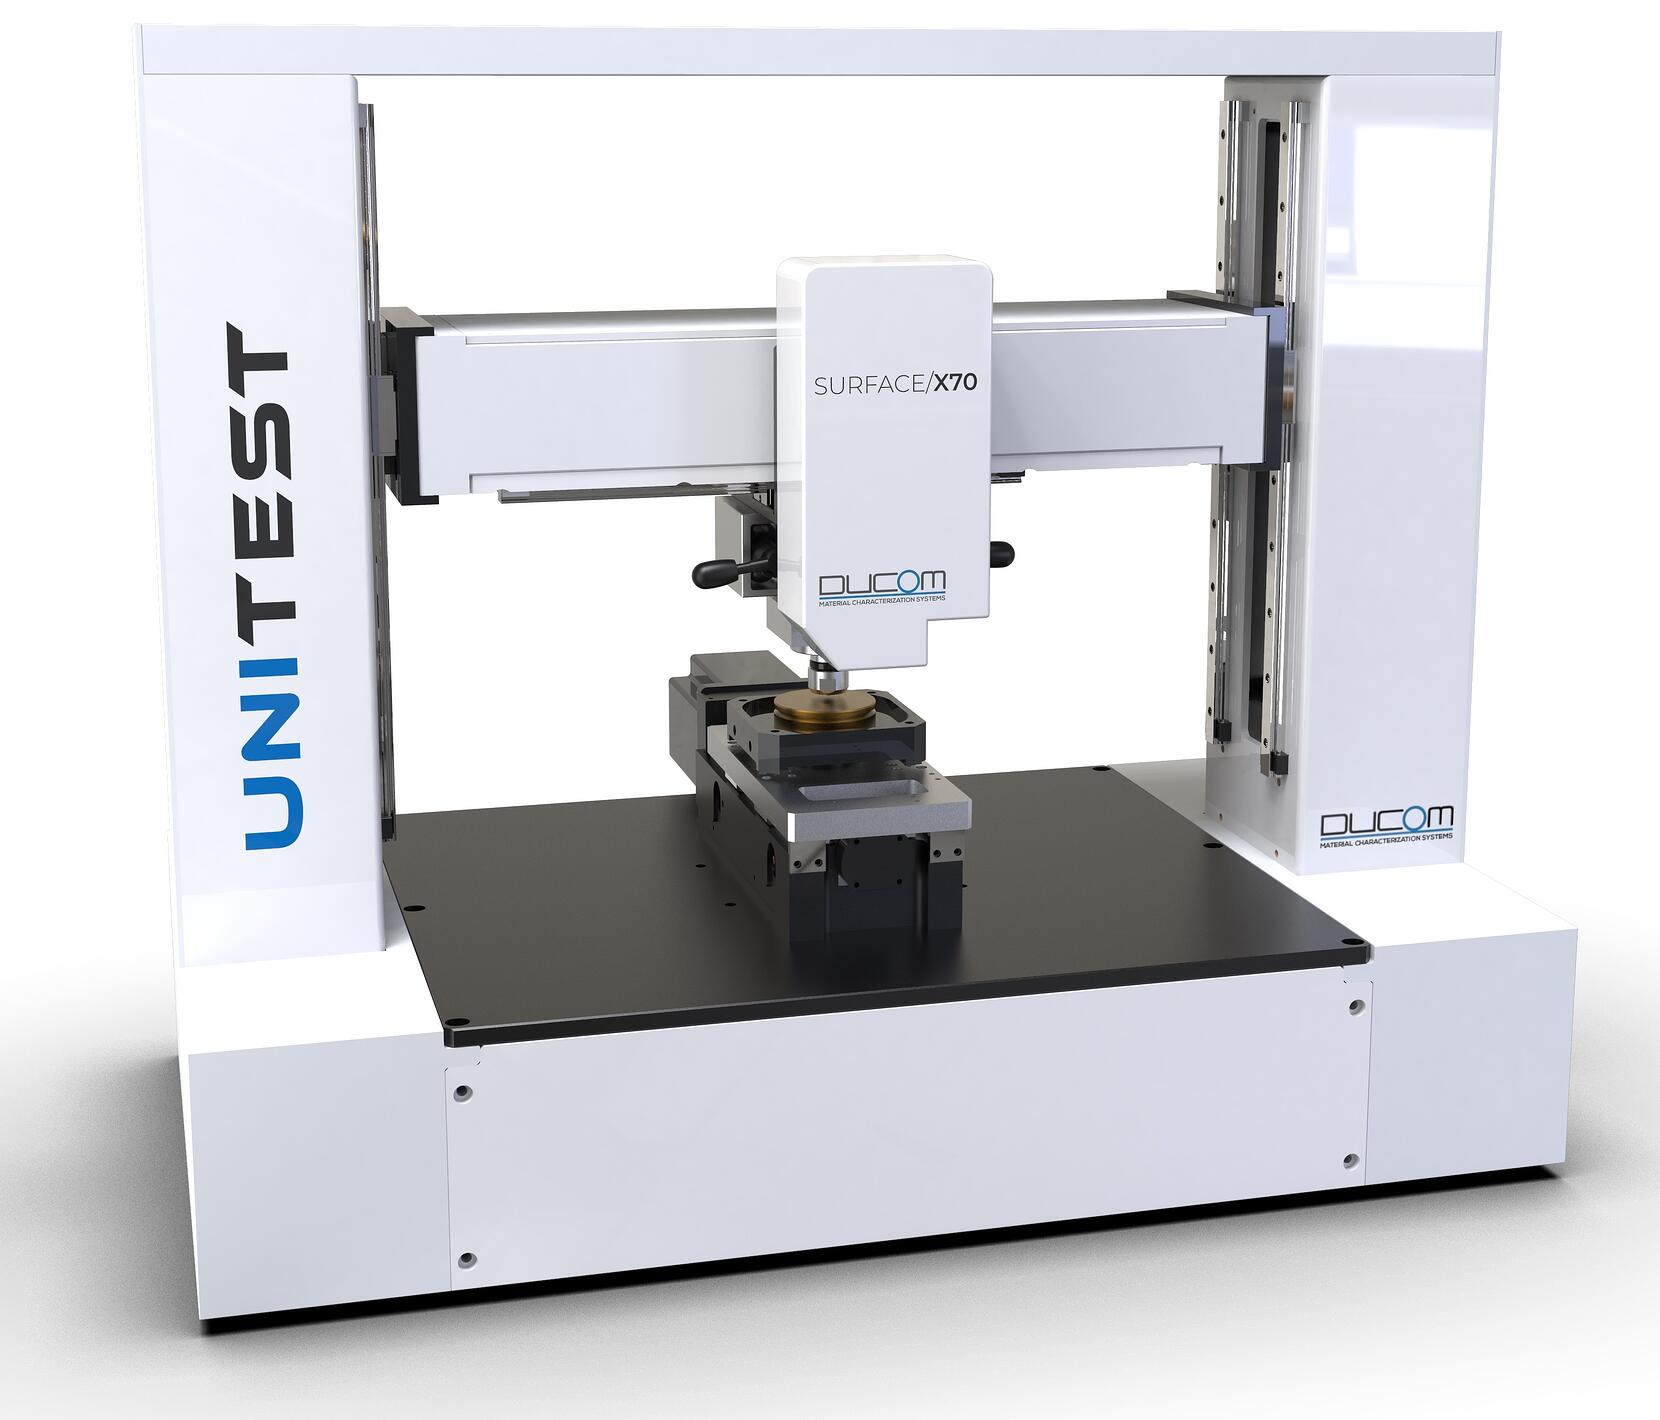
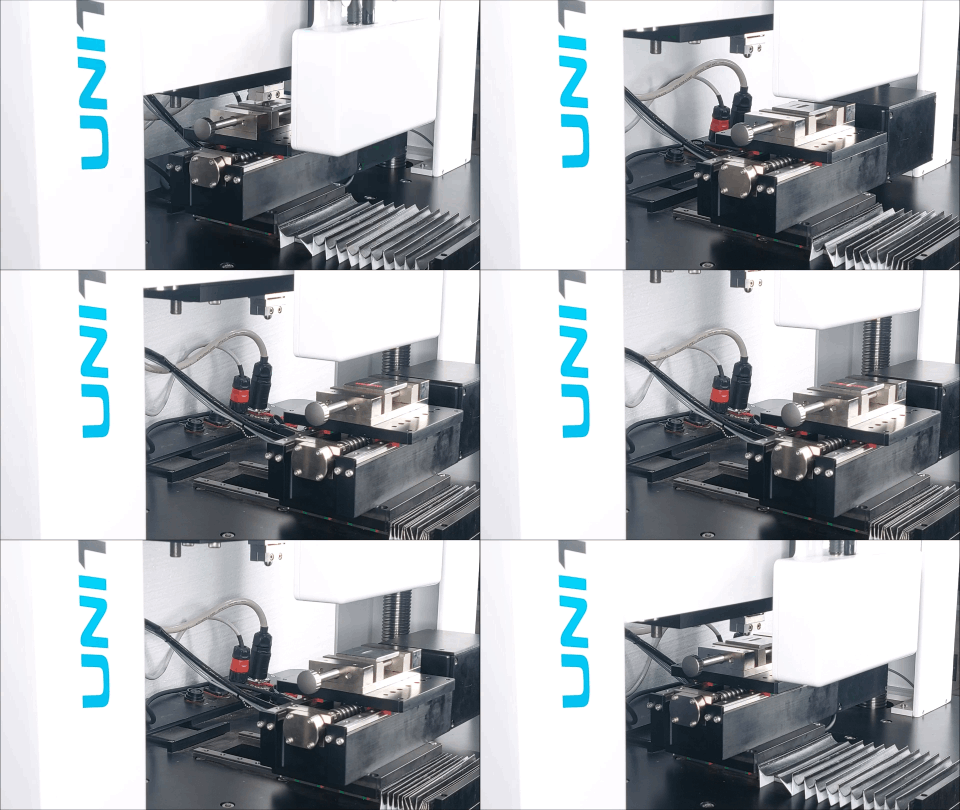
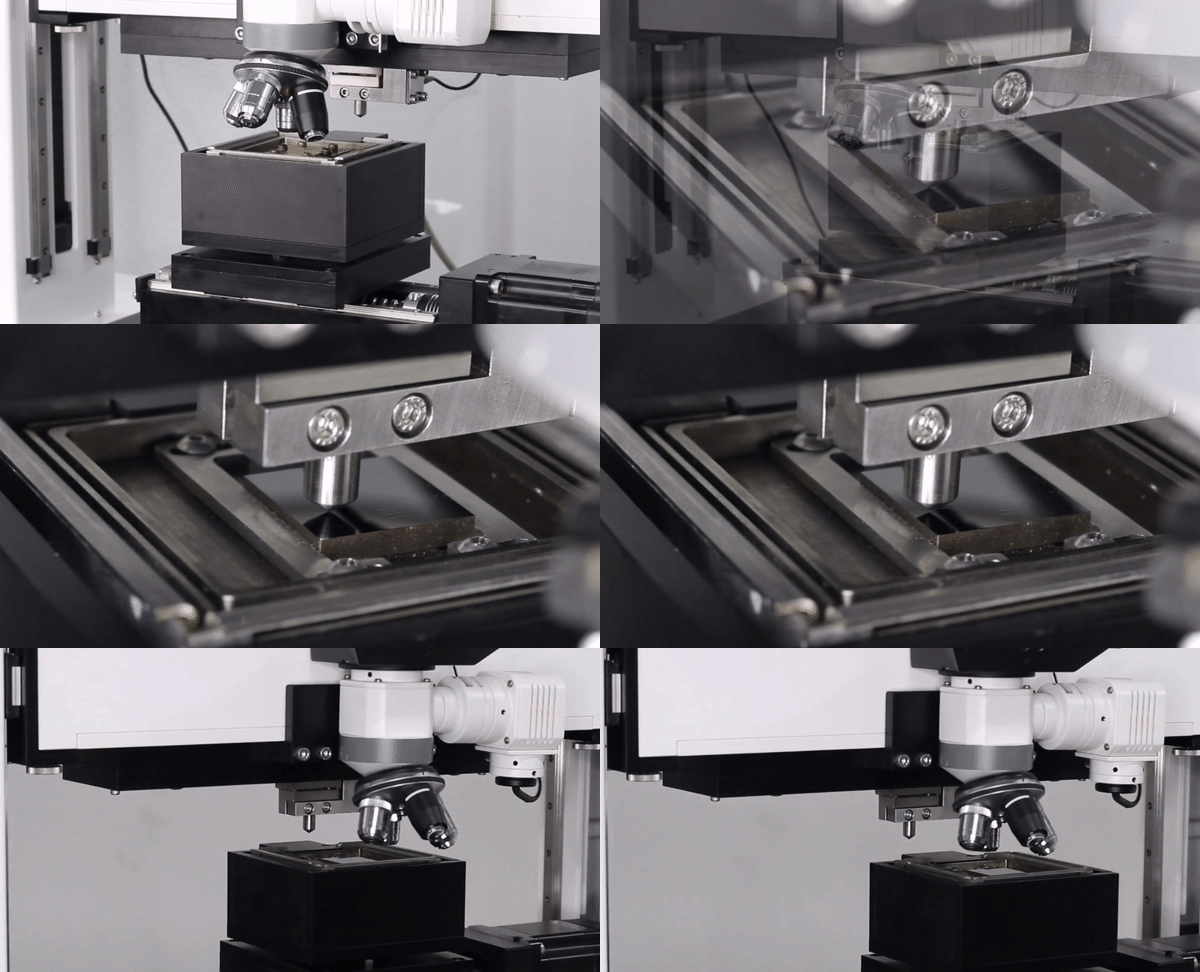
A non-contact 3D profilometer (Surface X/50) is mounted on the moving cross-beam of the UNITEST platform. Automated sample movement between the mechanical and imaging modules on a single GUI integrates sensor and imaging data seamlessly. A common frame of reference offers indexed and location specific friction, wear and surface topography evolution that offers a distinct advantage compared to standalone systems.
UNITEST
ONE PLATFORM TO DO IT ALL.
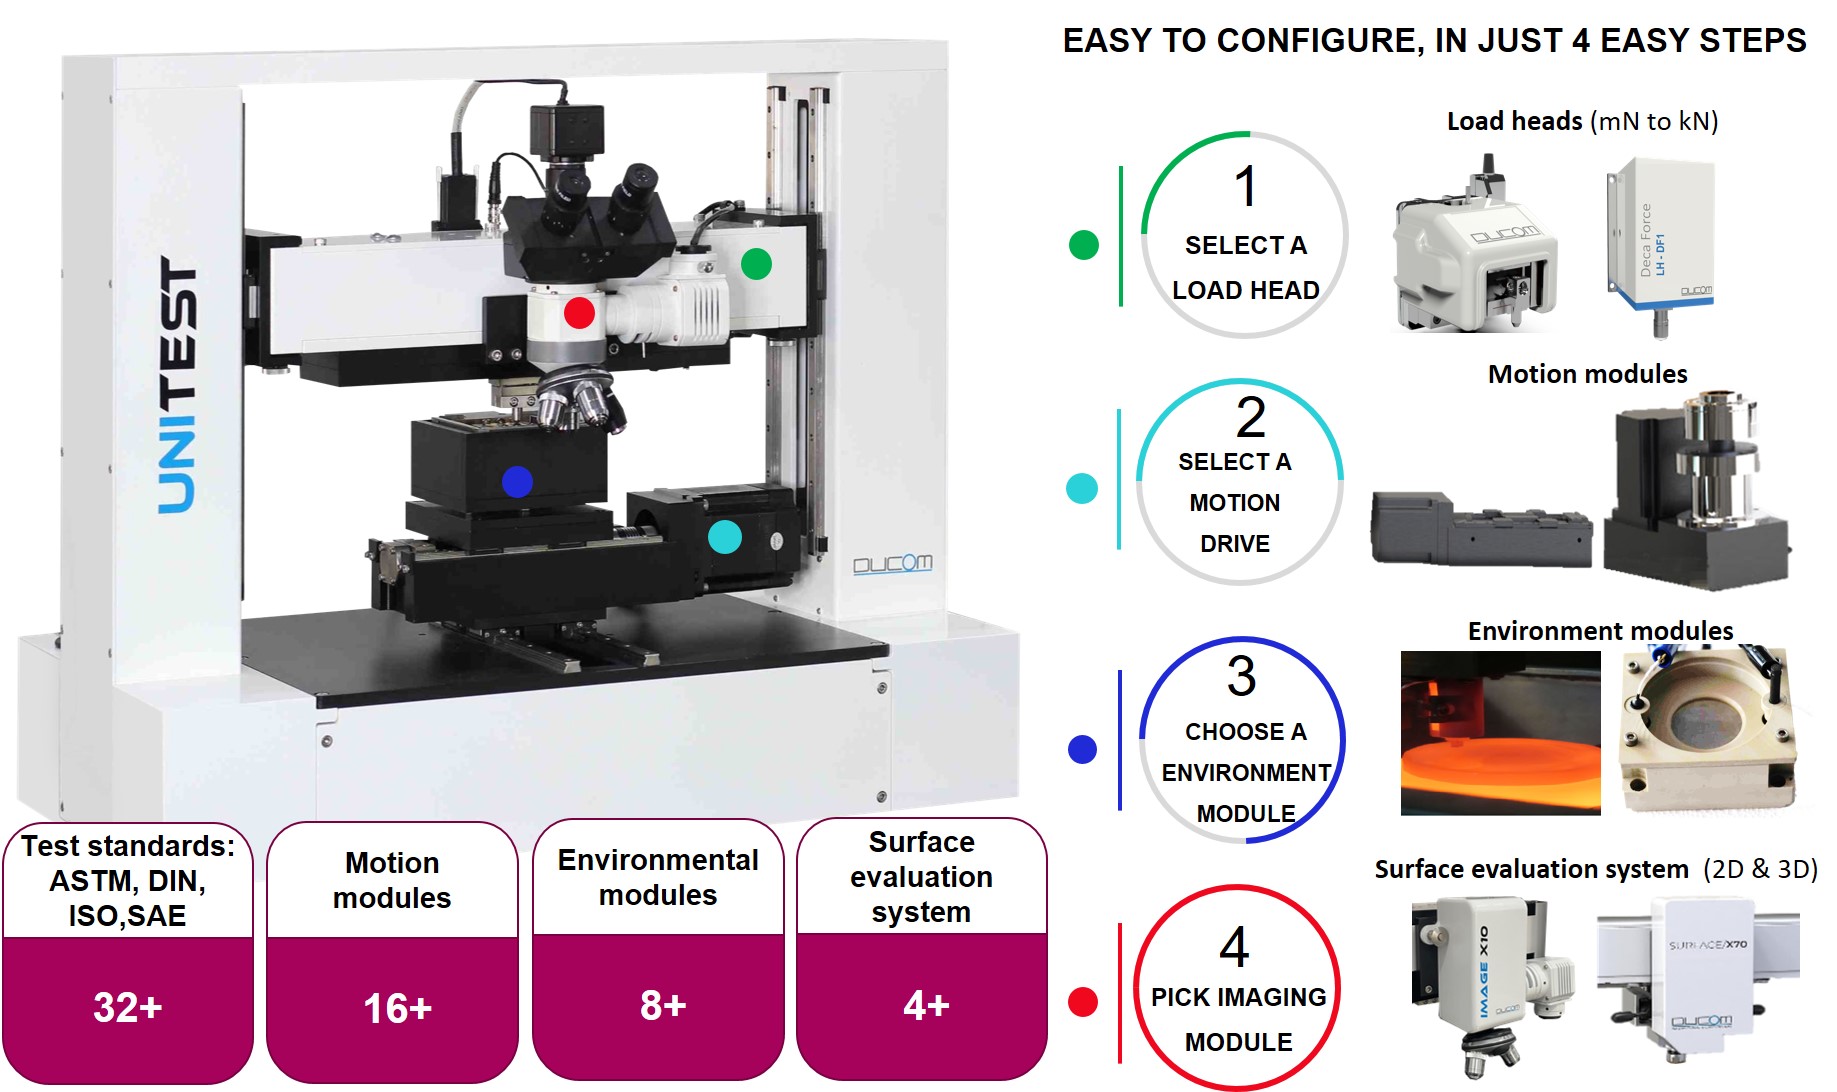
Whether it is mechanical testing, tribology or surface imaging, the UNITEST can handle it. Our patented platform design offers the ability to move and sense with precision in up to 6 independently controlled axes. Its unique open architecture platform gives you full flexibility to accommodate a vast testing ecosystem with ease of interchangeability.
Our plug-and-play 2D and 3D surface imaging modules can accommodate both our proprietary as well as world class 3rd party optical microscopy and profilometry technologies, something that is unique compared to any other universal tribometer available in the market.
in-situ wear and friction evolution
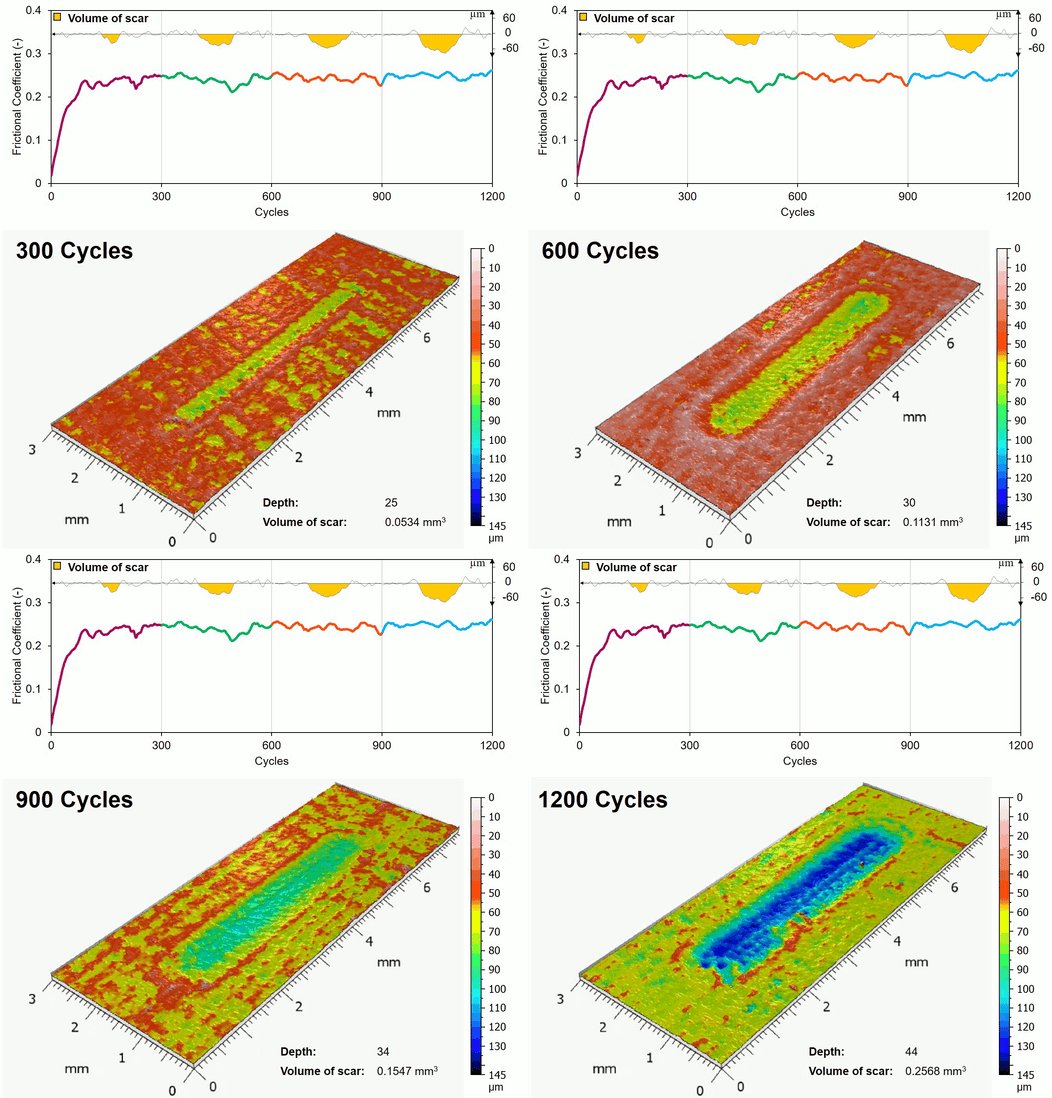
Linear reciprocation tests were conducted using a steel ball against brass. Tests were interrupted at 300, 600, 900, and 1200 cycles for imaging wear scars using Surface X/50. Friction plot indicated a steady-state regime with a COF ~ 0.25. The wear track depth increased sharply to 25 μm in the first 300 cycles to due to ball on disc configuration with a corresponding increase in friction during the run-in phase. Subsequently, the wear depth increased from 25 to 44 microns over next 900 cycles post the initial 300 cycles, corresponding to an average steady state material removal of ~ 0.02 microns per cycle. Volumetric wear from the 3D topography maps obtained from Surface X/50 provided a specific wear rate of ~ 1.88 × 10⁻³ mm3/N-m. Thus wear depth, wear volume and friction evolution at the same location could be correlated during the tribology test.
IN-SITU COATING DAMAGE EVOLUTION
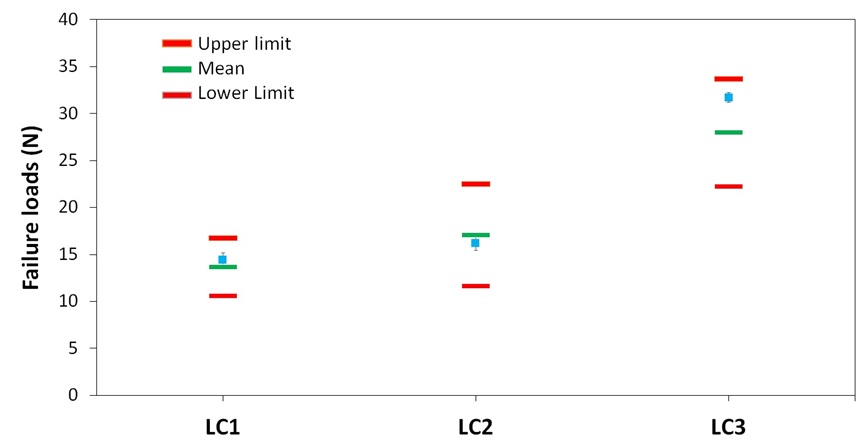
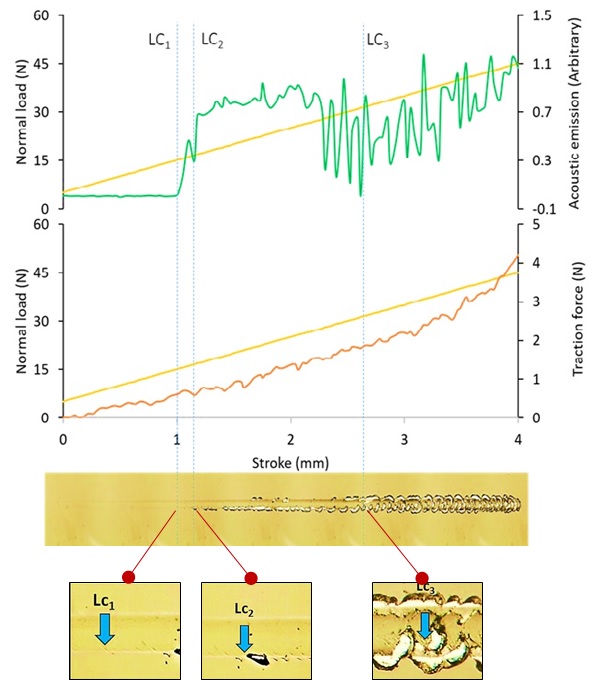
A certified reference material, DLC coating (BCR 692), was tested as per ISO 20502 scratch standard with real-time acoustic emission (AE) data and 2D surface X/10 system on UniTest Scratch configuration. The critical cohesive (Lc1) and adhesive (Lc2,Lc3) failures were accurately identified from the X/10 images and quantified from the acoustic emission and load profiles. These were within the precision limits for BCR 692. In-situ optical microscopy combined with acoustic emission data can accurately identify coatings surface damage.
ULTRA LOW WEAR
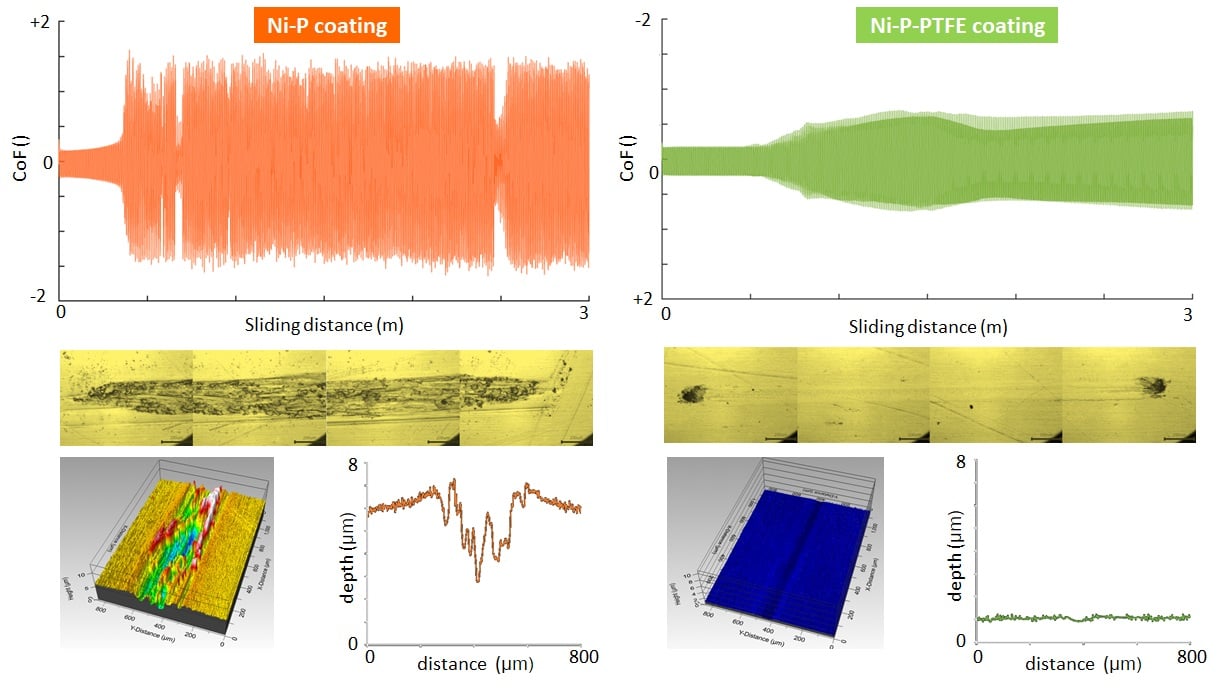
Ni-P and Ni-P-PTFE composite coatings were tested under linear reciprocation using a ball on disc geometry and imaged using both Surface X/10 and Surface X/75 modules. Ni-P coating showed delamination (X/10 images) and corresponding spike in friction. Ni-P-PTFE coating showed no surface topography changes (X/10 and X/75) but a gradual friction evolution indicating plastic deformation. Wear per cycle was an order of magnitude lower for Ni-P-PTFE coating (~ 0.002 μm/cycle) compared to Ni-P coating (~ 0.02 μm/cycle). Combining friction with both 2D optical (true color) and 3D profilometry can help differentiate and develop coatings that exhibit ultra-low wear rates
%20-%20PNG.png?width=925&height=246&name=Ducom%20-%20Logo%20-%20Full%20-%20Vector%20(90%20Gray%20and%20Light%20Blue-Inverted)%20-%20PNG.png)
